4.26.2013

Favorite Party Snack Mix

Thank God for Chex.


This is not an advertising plug, promise.


My husband has always adored Chex Mix. I'll admit, I kinda like it myself. It's one of those go-to snacks for road trips and parties and such. Unfortunately, the bags you can buy in stores of the pre-made stuff - not so much gluten-free friendly, if you know what I mean. They're loaded with bagel chips, pretzels, wheat Chex...all perfectly delicious as far as the hubs is concerned. But I certainly can't eat it without getting sick. Or I have to carefully pick out the none-offenders...and that's not so much fun.


So I started making my own. It's become a staple in our house. I make a big batch every week. Between the two of us, it doesn't last very long. And it's so easy to make yourself - takes less than 15 minutes.


When I first started experimenting, I pretty much stalked the Chex website - it contains tons of cool gluten-free recipes. I tried all the fancy variations, tweaking them as I went along. This ended up being our favorite. It is very similar to the traditional Chex party mix recipe, however it is completely gluten-free and I have made a few changes to fit our personal tastes.


This recipe is awesome! It has that great balance of salty and sweet and it's relatively addictive. Just sayin'. This is super easy and quick if you cook it in the microwave. The first few batches I made were done in the oven, but I realized it's a waste of time and electricity/gas. It comes out just as beautifully crunchy in the microwave in a fraction of the time. Feel free to change up the ingredients, if it suits your fancy. But trust me, you'll never go back to the bag mix again!


Favorite Party Snack Mix

Prep Time: 5-10 minutes
Cook Time: 5 minutes
Yield: 24 (1/2 cup) servings
  • 3 cups Rice Chex
  • 3 cups Corn Chex
  • 3 cups Cinnamon Chex
  • 2 cups Gluten-free Mini Pretzels (I like Snyder's)
  • 1 cup Mixed Nuts, lightly or unsalted
  • 6 Tbsp Light Butter
  • 2 Tbsp Worcestershire Sauce (Lea & Perrins is gluten-free)
  • 1 tsp Old Bay Seasoning, reduced sodium
  • 1 tsp ground Cinnamon
  • 3/4 tsp Garlic Powder
  • 1/2 tsp Onion Powder
  1. In a large mixing bowl, combine Rice Chex, Corn Chex, Cinnamon Chex, pretzels and nuts. Stir to combine.
  2. In a liquid measuring cup or small bowl, melt butter on high heat in microwave for 45 seconds to 1 minute - make sure you cover it with wax paper (plastic wrap might melt) so it doesn't splatter.
  3. To melted butter, add Worcestershire sauce, Old Bay, cinnamon, garlic powder and onion powder. Whisk or stir well to combine.
  4. Add butter mixture to cereal mixture and toss well to coat with a large spoon or rubber spatula.
  5. Place large mixing bowl in microwave and cook on High heat for 2 minutes. Remove bowl and stir contents. Repeat on High for 1 minute - remove and stir. Do this twice more, until Chex mix has cooked for a total of 5 minutes on High heat, stirring intermittently so it doesn't clump together.
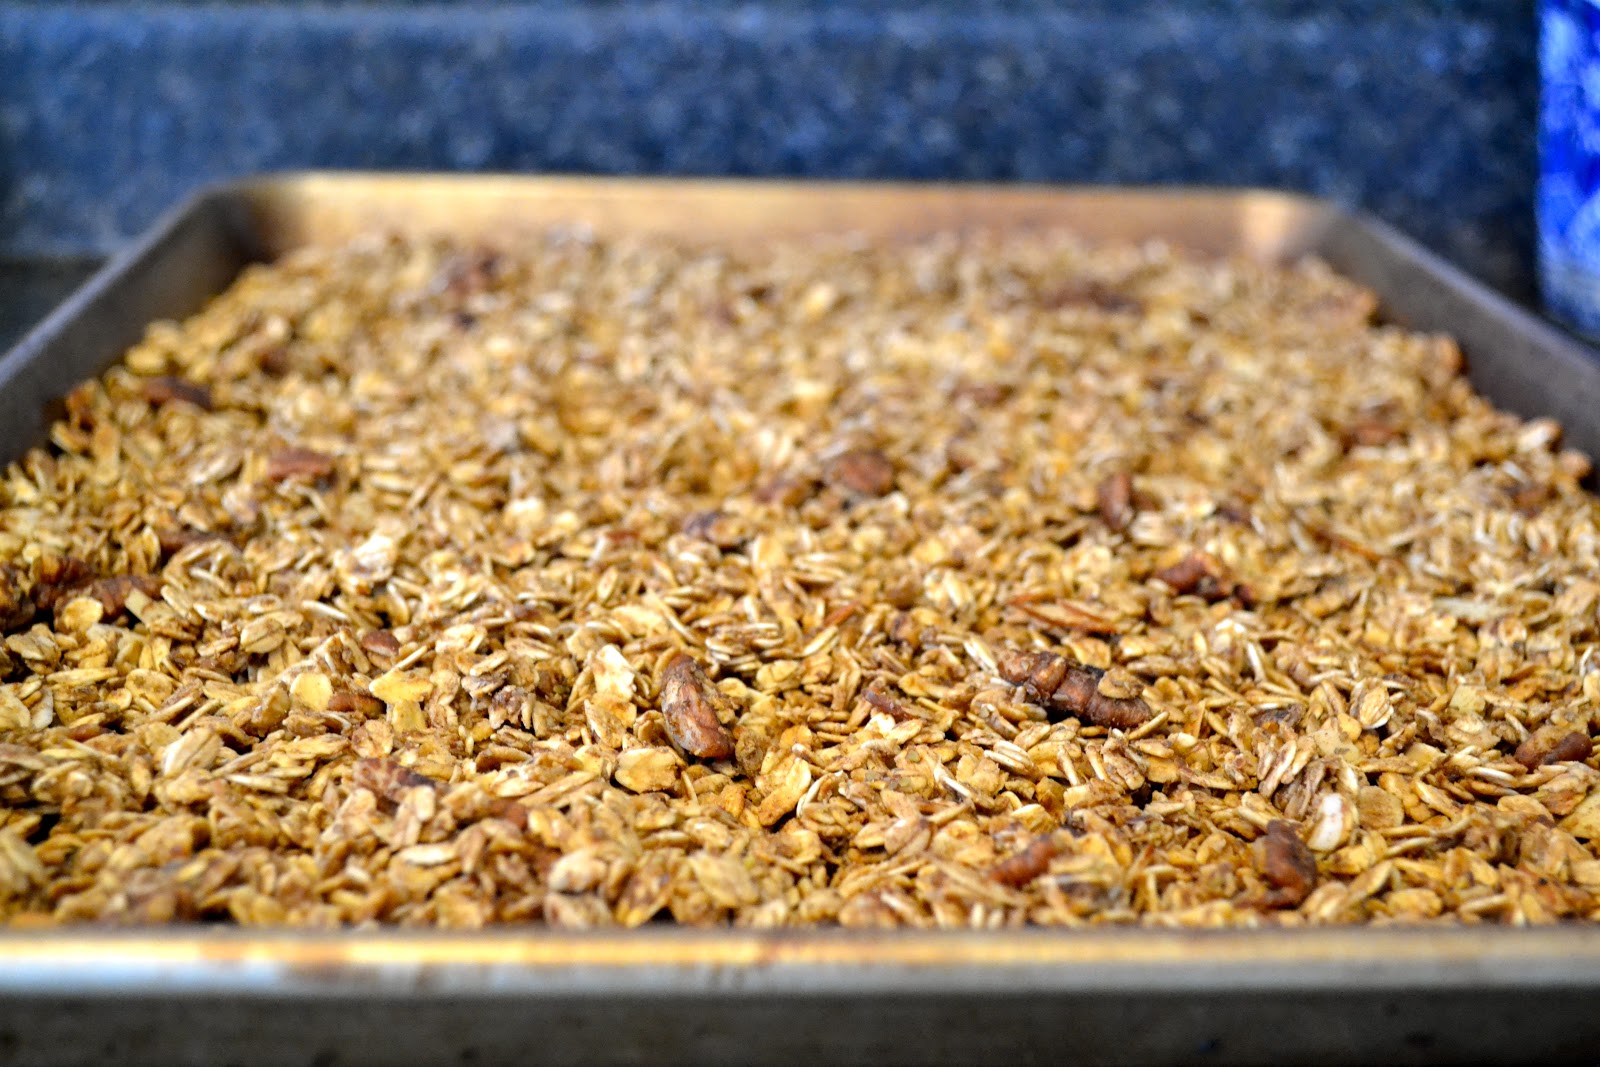
  6. Dump contents of bowl onto a rimmed baking sheet that has been lined with parchment or a Silpat. Allow to cool completely. Store in an airtight container for up to one week.

Oven Directions: Preheat oven to 250 . Follow above directions through Step 4. Dump contents of bowl (unbaked) onto a rimmed baking sheet that has been lined with parchment or a Silpat. Bake for 1 hour, stirring mixture every 15 minutes. Remove from oven and allow to cool completely on baking sheet. Store in an airtight contained for up to one week.
*Adapted from Chex*


Happy gluten-free baking!


4.06.2013

Lemon Couscous Salad


Some recipes just cry out, "SPRING!" 

This is one of those recipes. With fresh baby spinach, spring onions and dill...how could you possibly go wrong?
Speaking of Spring...where the heck is it?! Here in upstate NY, Spring is just barely, and I mean BARELY, peaking around the corner. I think we can all take this opportunity to officially discredit Punxsutawney Phil and his ridiculous forecast this year. This has been like the longest Winter of my life...

Anywho - I stole this awesomely easy and satisfying recipe from the mother of one of my college roommates. Emily's family would come over a couple times a month and we'd have big family dinners. This salad was prepared a couple of times and I adored it! I'm sure she herself adapted the recipe from elsewhere, as I have seen various other versions online. 

Here is my version, with the permanent addition of feta cheese. It gives it a nice, salty bite. I have also increased the amount of fresh lemon juice from the original recipe. And, of course, used gluten-free couscous.

Can I just tell you, when I ever found out that Lundberg makes a delicious brown rice couscous, I thought I'd died and gone to heaven. Couscous - along with tortellini, ravioli, pizza, and english muffins - was right up at the top of my list of gluten-full foods that I've missed the most.

This dish is incredibly easy to put together. It just needs a little bit of prep time and a few hours to relax in the fridge. It's an awesome dish to bring to potlucks or picnics as there is no mayonnaise that might spoil. You can leave out the feta if you like. You can also try adding toasted pine nuts for an extra crunch and a bit of nuttiness. Although, the brown rice couscous has a great nutty flavor that really comes through in this dish.


This salad is wonderfully light and refreshing. Great alongside a nice grilled steak or chicken breast, or all by itself as a light lunch - which is how I like it best. I'll confess, I ate most of this salad...all 6 servings worth...my husband only brought a little to lunch a couple of days last week. Oh well, it was worth it! Enjoy!

Lemon Couscous Salad

Prep Time: 15 minutes, plus additional cooling

Yield: 6 servings (about 1 cup each)


  • (1) 10-ounce box Brown Rice Couscous (try Lundberg)
  • 3-4 Tbsp fresh Lemon Juice
  • 1/4 cup good quality Extra-Virgin Olive Oil
  • 2 cups Baby Spinach, washed, dried, and finely shredded
  • 3 large Scallions, sliced thin
  • 3 Tbsp fresh Dill, finely chopped
  • 1 cup Feta, preferably reduced-fat or fat-free
  • Salt and Pepper, to taste
  1. In a small saucepan, prepare couscous according to package directions. 
  2. Fluff couscous with a fork and transfer to a large mixing bowl. Stir in lemon juice, olive oil, and salt and pepper to taste and allow couscous to cool completely - you may have to place it in the refrigerator for a few hours. 
  3. Stir in spinach, scallions, dill and feta; combine well.
  4. Chill salad, covered, for at least 2 hours or overnight. Serve cold or at room temperature.
Tip: Try adding 1/4 cup toasted pine nuts to round out the texture - delish!


Happy gluten-free cooking!


3.30.2013

Ham, Brie & Peach Panini

So...we will be leaving upstate NY in about 5 weeks.

Sad day.


I lied. Not really - I'm not sure that I would ever want to move back here...

No offense to the Navy, but they couldn't have picked a more obscure place to have a training facility. Okay, okay, perhaps I'm exaggerating. But only a little.


Seriously though. We're nowhere near the ocean. There are no beaches - and, I'm sorry, Lake George does not count. Half the local population doesn't even know that the Navy is here. The other half doesn't fully understand why. So at least I'm not alone.


There are a few things that I will miss about this place:

  1. Saratoga has some pretty awesome (gluten-free friendly) restaurants
  2. Our farmer's market is pretty fantastic - and I will definitely miss our CSA
  3. My very best friends, and the place I grew up, are only a couple short hours drive heading southeast
  4. The friends we've made here
  5. Being so close to NYC...and Boston...and Philly
  6. You can take the girl out of New England, but you can't take New England out of the girl - I will completely and totally miss the Autumn foliage


There's also a pretty substantial list of things I will not miss. But I'll keep those to myself for now...


From here we move back to the great state of Washington...but not before getting through a 6-month deployment and a temporary stint with my parents on the Gulf coast of Florida. So fairly soon I will be broadcasting to you live from the sunny beaches of Southwest Florida. Amen.


This delectable looking sandwich is a tribute farewell to the Empire State and all the local deliciousness I am giving up by moving away. The recipe is a replica of my favorite sandwich at my favorite restaurant here in upstate NY. I order it pretty much every time I go to eat there - and it is delicious every single time.


This home prepared panini is every bit as delicious as the original version - but I tweaked it a little bit. They serve theirs with the addition of bacon. I always order it without, so this recipe doesn't include bacon - but feel free to add it if you so choose. I imagine it adds a bit of texture and saltiness/smokiness. I have also made a version of this with raspberry peach preserves (I couldn't find apricot jam at the time) and it turned out GREAT! So experiment with different jams, you might be surprised!

Ham, Brie & Peach Panini

Prep Time: 10 minutes
Cook Time: 5-6 minutes
Yield: 2 sandwiches
  • 4 slices Gluten-free Bread (use store-bought or homemade, whatever is your favorite and will hold up well to grilling)
  • 2 Tbsp Butter or Margarine
  • 1/4 cup Apricot or Peach Preserves (Raspberry Jam also works really nicely)
  • 1/2 ripe Peach, pitted and thinly sliced
  • 2 oz. Brie cheese, paper removed and thinly sliced
  • 3 oz. lean deli Ham, thinly sliced

  1. Pre-heat your grill pan or panini press. I use a cast iron griddle pan pre-heated over Medium heat.
  2. Slather one side of each slice of bread with 1 to 1 1/2 tsp butter or margarine. Slather opposite sides of bread slices with 1 Tbsp of preserves each.
  3. Place two slices of bread, buttered side down, on your grill pan or press. Begin layering ingredients on top of the preserves, splitting the ingredients evenly between the two slices of bread. Begin with the peaches, then the ham slices, then add the brie slices.
  4. Place the remaining two slices of bread atop each sandwich and press down with either a grill press, the top portion of your panini press, or another heavy object (like another cast iron skillet or pan). I do not have a grill press, so I use another cast iron pan, but I layer a piece of wax paper between the top of the sandwich and the pan to avoid a disastrous mess, I recommend you do the same if this is your only option.
  5. If using a griddle, grill sandwiches for 2-3 minutes, until nicely golden brown. Flip sandwiches over and repeat on other side. Wait 2-3 minutes until opposing side is also golden brown and cheese has melted. If using a panini press, griddle sandwiches for a total of 5-6 minutes, being careful not to burn. The preserves and/or cheese will likely leak out the sides of the sandwich and cause some sizzling. This is to be expected - it may even coat the bread, giving it a nice sweet crunch!
  6. Remove grilled sandwiches and slice in half. Serve while still warm with your favorite green salad or, in my case, the rest of the peaches!

Happy gluten-free cooking!


3.24.2013

Oat, Nut & Flax Granola

Allow me to vent for a moment.

There is nothing, and I mean nothing, I hate more (right now) than browsing the internet for gluten-free recipes and ending up with Paleo diet recipes on my search feed.

I'm sorry. I'm just not a fan. If there's anything I learned from my Nutrition classes - and I learned A LOT, mind you - it's that any diet, and I mean ANY diet, that cuts out entire food groups is bound to lead to T-R-O-U-B-L-E.

End of rant.

Thank you.


Trying to eat grains while on a gluten-free diet can be challenging. But that doesn't mean you should cut out grains altogether just to seemingly make life easier. When you cut out whole grains, you're also cutting out fiber and essential vitamins and minerals than can be difficult to get from other foods. Be smart and safe about where your gluten-free grains are coming from and make sure they're certified if you suffer from a severe allergy or Celiac's.


I have neither, my gluten intolerance is not severe, so I don't spend the extra money on gluten-free oats. This, however, is a personal choice. But I promise you that making your own gluten-free granola is going to be far cheaper than buying it! Pinky swear.


This recipe is an oldy but goody. I've been using it for years. My mother makes her own granola now too after trying mine during a visit a few years back. It's so easy, and so affordable. What could possibly be better?


This is also one of those recipes that you can totally personalize. Double it, change the nuts, use a different spice, use a different kind of juice (cranberry juice works really well), or use a different type of oil or extract. You can even add dried fruit, coconut, chocolate bits, or whatever you like. Make it work for you and your family. Enjoy served with fruit and yogurt or alone with milk!


Oat, Nut & Flax Granola

Prep Time: 10 minutes
Cook Time: 30 minutes
Yield: 3 1/2 cups (about 10 1/3-cup servings)
  • 3 cups gluten-free Old-fashioned Oats
  • 1/3 cup ground Flax Seed Meal
  • 1/4 cup slivered or sliced Almonds
  • 1/4 chopped Pecans
  • 2 tsp Ground Cinnamon
  • 1/3 cup Apple Juice
  • 1/3 cup Honey
  • 1/4 cup Dark Brown Sugar
  • 2 tsp Coconut Oil, melted
  • 1 tsp Almond Extract
  • Additional ingredients - Dried Fruit, Coconut, Chocolate Chips, etc - as desired
  1. Preheat oven to 300°F.
  2. In a large mixing bowl, combine first 5 ingredients (through cinnamon). Stir to combine.
  3. In a small saucepan, combine apple juice, honey, and brown sugar. Stir/whisk constantly over medium heat until brown sugar and honey have dissolved. Do not boil!
  4. Remove saucepan from heat and stir in coconut oil and almond extract.
  5. Add liquid mixture to oat mixture and stir well to combine.
  6. Line a jelly-roll pan or rimmed cookie sheet with a Sil-pat or parchment, or spray with cooking spray. Empty contents of bowl onto baking sheet and spread out into an even layer.
  7. Bake in preheated oven for 30 minutes, stirring every 10 minutes.
  8. Remove from oven and place on a cooling rack. Allow to cool completely.
  9. Add any additional ingredients you might like: raisins, dried cranberries, dates, other chopped dried fruits, coconut, chocolate chips, etc. Store in an airtight container for up to 2 weeks.

Happy gluten-free baking!


3.16.2013

Lemon & Roasted Garlic Hummus

Hummus in our house lasts about as long as peanut butter does...


About a week or so.


My husband slathers it on everything from bagels to toast to crackers to tortilla chips. I have it mostly with vegetables as an afternoon snack.


The first time I tried it, back in college, I thought it was fairly disgusting. My best friend liked to eat it and, as roommates, naturally we politely forced one another to try new foods. I decided hummus was not my cup of tea.


Then I met my husband. And he loved it too. But he loves pretty much anything that's packed with protein and can be put on toast. I decided, after a couple of years, that I would give hummus another chance.


Eureka!

I have no idea what changed, but I was hooked. Although, I did acquire a taste for some other random foods that I had previously hated during that same time, including coffee and beer. Good beer. Can't drink that anymore...


When I realized, some time later, how incredibly easy it is to make hummus, I was thrilled. I tinkered with some recipes I found online until I found just the right combination of tahini, lemon juice, and garlic. This recipe is such a staple in our house that I included it in the family cookbook we gave out as favors at our wedding.


A friend recently asked how easy it is to make hummus after I mused over making it to my husband in his presence. My reply, "Throw everything in a food processor and hit 'go' kind-of-easy!" 

This recipe really is super simple. The most complicated part is roasting the garlic. I tried some recipes that called for raw garlic and it just didn't work. This recipe can also be used as a great foundation - play with it! Figure out what you like and don't like. This has a bit more lemon juice than you might personally care for, so change it! Or maybe you want more tahini - go ahead. I don't mind. I truly believe in taking a recipe and making it your own. I hope you enjoy this hummus recipe as much as we do.

Lemon & Roasted Garlic Hummus

Prep Time: 10 minutes
Cook Time: 15 minutes (garlic)
Yield: 2 cups
  • 2 15-oz cans Chick Peas (Garbanzo Beans), drained (liquid reserved and set aside) and rinsed
  • 2 Lemons, juiced
  • 2 Tbsp Tahini
  • 4 cloves Garlic
  • 1/4 cup good Extra Virgin Olive Oil, plus additional for roasting garlic and drizzling
  • Salt & Pepper, to taste
  • 1-2 Tbsp Pine Nuts, as garnish
  1. Preheat oven to 450°F.
  2. Place garlic cloves, unpeeled, on a square of aluminum foil. Drizzle lightly with olive oil. Wrap up foil into a nicely sealed packed or pouch. Roast in preheated oven for 10-15 minutes, or until soft. Set aside and allow to cool completely.
  3. In a food processor, fitted with a metal blade, combine chick peas, lemon juice, tahini, and roasted garlic. Process until smooth - stop to scrape down sides of bowl.
  4. Turn processor back on, slowly add olive oil in a steady stream while processor continues to run. Stop to scrape down sides of bowl and taste test.
  5. If mixture is not smooth enough, add reserved bean juice, 1 Tbsp at a time while processor is running, until mixture comes together and is nice and smooth (or it reaches your desired consistency). 
  6. Add salt and pepper to taste; pulse 6-8 times to combine.
  7. Transfer hummus to a serving dish. Drizzle lightly with Extra Virgin Olive Oil and sprinkle with pine nuts.
  8. Serve with your favorite gluten-free crackers, toasted pita bread, vegetables, or anything else your heart desires! Will keep for up to two weeks in a sealed container in the refrigerator.

Happy gluten-free cooking!


3.07.2013

Butternut Squash Beef Stew (Slow Cooker)

This is not your mom's beef stew. Or your grandmom's beef stew.


In fact, up until I tried this recipe a few years ago, I made beef stew exactly the way my mother did. It was all I'd ever known. I think we all probably do that...


You know...the standard beef, carrots, celery, onions, and potatoes...


Then I tried this recipe on a whim. Holy delicious! Who would have ever thought to put sun-dried tomatoes and butternut squash in beef stew??


This is actually a Giada De Laurentiis recipe, courtesy of the Food Network. However, her version is not gluten-free. And it is not done in the slow cooker, it's done on the stove-top in a dutch oven. If you prefer that method, you could certainly take a look at the original recipe!


For convenience, I turned this into a slow cooker recipe. Because if I can let that beautiful appliance do all the work for me, I would certainly rather.


However, keep in mind that this recipe calls for the squash and tomatoes to be added halfway into the cooking time (about 4 hours or so). If you are not going to be around to add those ingredients, you can certainly add it at the beginning. Just be prepared for the squash to be on the mushy side.


There's something about beef stew, simmering away all day, that warms the heart and tickles the senses. I adore the smell of this while it's cooking. My husband came home from work and declared, "Honey, the house smells REALLY good!" I'll take that as a compliment...


Serve this stew over rice or mashed potatoes if you wish. I serve it with chunks of warm, homemade, multi-grain gluten-free bread and a sprinkle of fresh chopped parsley. If you don't have Marsala, you could certainly use Sherry - though I don't know that I would recommend any other kind of wine. You could also use fresh herbs instead of dried (just use 1 Tbsp of each, instead of 1 tsp). This recipe also doubles nicely to serve a crowd or to have plenty of leftovers.

Butternut Squash Beef Stew (Slow Cooker)

Prep Time: 15 minutes
Cook Time: 8-10 hours
Yield: 4-6 servings
  • 2 Tbsp Olive Oil
  • 1 1/2 lbs Stew Beef or Bottom Round Roast, trimmed and cut into 2-inch chunks
  • 1/2 tsp Salt
  • 1/2 tsp Black Pepper
  • 2 Tbsp Gluten-free Flour or Cornstarch
  • 1 large Onion, peeled and chopped
  • 2 cloves Garlic, peeled and chopped
  • 1 tsp dried Rosemary
  • 1 tsp dried Thyme
  • 1 cup Marsala Wine
  • 26 oz Beef Stock
  • 1 lb Butternut Squash, peeled and cut into 2-inch cubes
  • 1/4 cup Sun-dried Tomatoes, julienned
  • Chopped fresh Parsley, for serving
  1. Heat oil in a large non-stick skillet over medium heat. In a large zip-top bag, combine flour, salt, pepper and beef chunks. Shake to coat. Place half of beef in hot oil and sear on all sides until browned, a couple minutes per side. Drain or shake off excess oil and place in basin of slow-cooker; repeat with remaining beef chunks.
  2. Use 1/4 cup of the beef stock or wine to deglaze the skillet. Simply add the liquid to the pan after you have removed the meat and it is still hot. Use a wooden spoon to scrape up all the browned bits then pour the liquid into the slow-cooker basin with the meat. Don't allow the liquid to cook down at all - you're just quickly deglazing the pan because you want all that flavor!
  3. Place diced onion, minced garlic, thyme, and rosemary in the slow-cooker basin with the meat. Pour in remaining beef stock and Marsala wine. Cover and set slow-cooker to low-heat for 8 -10 hours.
  4. After 4-5 hours of cooking, add cubed butternut squash and sun-dried tomatoes to the mixture. Stir well to combine and replace the cover. You can add it all at the beginning, but the squash will become mushy and break down if it cooks for too long.
  5. Season with salt and pepper to taste just before serving. Ladle into individual bowls and sprinkle with fresh, chopped parsley. Serve with your favorite crusty gluten-free bread or rolls!
*Adapted from Food Network*

Happy gluten-free cooking!


2.28.2013

Banana Ginger Scones

So, I'll be honest. I made these scones a couple of weeks ago....and then kept forgetting to take pictures of the finished product.


I finally remembered as the very last scone was about to be consumed. It was delicious - so it served it's purpose.


When I told my mom I was making these scones she was a bit jealous. Her response over the phone: "I want one!!!" She and I are a scone-loving pair. Imagine my grief-stricken scone-loving self when told I should remove gluten from my diet.


Yikes.


This was my first attempt at scones since going gluten-free. I've been getting ever more adventurous with my baking. Gluten-free flours and the elusive xanthan gum are no longer my enemies. Thank. God.


When I decided to play around with these puppies, it was all because of a pair of very lonely, VERY overripe bananas sitting in my fruit bowl. My husband has a secret (okay, maybe not so secret) love affair with banana bread. But banana bread is old hat. I wanted something new. And I was craving scones. So I gave him the choice: banana bread or banana scones.... Then swayed him in my direction.


I love the bites of sweetened spiciness that the bits of ginger add to these scones. But I'm a ginger fanatic anyway. I chew on pieces of ginger after lunch and dinner and to help settle my stomach when I'm experiencing indigestion. Best trick ever.


You could make these scones with regular all-purpose flour. It actually works out to be about the same amount as the gluten-free flour, which is typically not the case, but true here. Use any kind of milk you like - I used dairy free - or swap out the butter for margarine or shortening. You can definitely use plain, unsweetened yogurt. In that case I would recommend increasing the amount of added sugar by 1 Tbsp or so. These are not quite as crumbly as traditional gluten scones, but I kind of liked them that way. I could toss them in my toaster oven and not worry about them falling apart!


Play around with these! If you don't like ginger, I won't be offended. Use cinnamon, chocolate chips, or dried fruit. That's the beautiful thing about scones - they don't discriminate. And they pretty much always taste good!


Banana Ginger Scones

Prep Time: 15 minutes (+ 30-60 minutes chilling time)
Cook Time: 30 minutes
Yield: 8 scones
  • 2 large Bananas, very ripe - peeled and mashed thoroughly with a fork
  • 2-4 Tbsp Unsweetened Almond Milk (or any other milk - if using cow's milk, I recommend 2%)
  • 6 oz container Vanilla Non-Fat Yogurt (Stonyfield is a great choice!)
  • 12.5 oz Gluten-Free Flour Blend (a scant 3 cups)
  • 3 Tbsp Sugar
  • 2 tsp Baking Powder
  • 1/2 tsp Xanthan Gum
  • 1/2 tsp Salt
  • 1 tsp Ground Ginger
  • 4 Tbsp Light Butter, chilled
  • 1/3 cup finely chopped Crystallized Ginger
  • Turbinado Sugar, for sprinkling
  1. Place the mashed bananas into a 1-cup measure. Add enough milk to equal 1-cup, if necessary. If the mashed bananas equal 1-cup alone, then do not add any milk. Pour bananas and milk into a small mixing bowl, add yogurt and stir to combine; set aside.
  2. In a medium mixing bowl, sift or whisk together dry ingredients: flour, sugar, baking powder, xanthan gum, salt, and ground ginger.
  3. Break butter into small chunks. Add to dry ingredients and cut in with a fork, your fingers, or a pastry blender, until mixture is coarse and crumbly.
  4. Add wet ingredients to dry ingredients and stir until ingredients have come together. Dough should be wet and very sticky.
  5. Turn dough out onto a sheet of parchment or wax paper and form into a disc - about the size of a dinner plate. Cover with another piece of wax paper and wrap tightly. Place in the freezer for at least 30 minutes. This will allow the butter to firm up.
  6. Preheat the oven to 400°F. Once the dough has set, remove it from the freezer and remove the top piece of wax paper. Flip over onto a baking sheet lined with a Silpat or parchment paper and remove the second piece of wax paper. Cut the dough into 8 wedges and push them apart slightly, so they have some room to spread when they bake. Sprinkle each wedge generously with Turbinado sugar.
  7. Bake scones for 30 minutes, or until they have turned golden brown and are firm to the touch. Remove from oven and allow to cool completely on the baking sheet. Or enjoy while still warm with butter or jam and tea!
*Adapted from theKitchn*


Happy gluten-free baking!